Introduction
In every household, plumbing issues are inevitable. While calling a professional plumber might be the first thought, DIY plumbing know-how can resolve many common pipe problems. Common pipe issues can be addressed confidently using these practical DIY approaches. This article aims to empower you with the skills to confidently tackle and fix common plumbing issues in your home. From leaky faucets to clogged drains, follow our step-by-step solutions to become your plumbing hero.
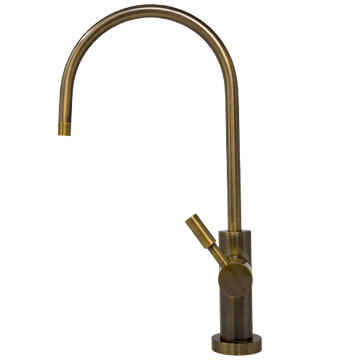
1. Leaky Faucets
Leaky faucets are annoying and can lead to water wastage and higher utility bills. Turn off the water supply, disassemble the faucet, replace worn-out O-rings, and reassemble. Ensure all connections are tight before turning the water back on. Regularly check for leaks and address them promptly to prevent further damage.
Leaky faucets can occur for various reasons, such as worn-out washers or damaged valves. A simple inspection of the faucet's internal components can reveal the source of the leak. When replacing O-rings or washers, it's essential to use the right size to ensure a proper seal.
2. Clogged Drains
Clogged drains are a common nuisance. Instead of reaching for chemical drain cleaners, use a plunger or drain snake to remove the blockage. Mix equal parts baking soda and vinegar for a natural solution, pour it down the drain, and let it sit for 30 minutes. Follow up with hot water to flush away debris. Implementing preventive measures like using drain guards can also reduce the likelihood of clogs.
Persistent clogs may require more advanced techniques, such as using a plumbing drill to break through stubborn blockages. Regular maintenance, including periodic flushing with hot water, can help prevent the buildup of grease and debris in the pipes, reducing the risk of clogs. DIY plumbing advice guides you through the intricacies of home plumbing projects.
3. Running Toilets
A running toilet wastes water. To fix it, remove the toilet tank lid and inspect the flapper. Replace it if worn or damaged. Adjust the float level and ensure the chain connecting the flush handle to the flapper is appropriately sized. Regularly check and replace components to maintain the toilet's efficiency and prevent water wastage. DIY plumbing becomes a manageable task with the right guidance and techniques.
Running toilets often result from a faulty flapper or a misadjusted float. These components are integral to the toilet's flushing mechanism. Ensuring the flapper forms a watertight seal and adjusting the float to the correct level can prevent water from continuously running into the bowl after flushing.
4. Low Water Pressure
Low water pressure can be frustrating, but there may be simple solutions. Check for mineral deposits or debris in the faucet aerator. Remove, clean, and reattach the aerator. Inspect the water shut-off valve to ensure it's fully open. Consider installing a water pressure booster if low pressure persists, but consult a professional for proper installation.
The faucet aerator, a small device located at the tip of the faucet, can accumulate mineral deposits over time, restricting water flow. Cleaning or replacing the aerator is a quick and cost-effective solution to restore proper water pressure. Additionally, ensuring that the main water shut-off valve is fully open allows for maximum water flow to all fixtures in the house. Plumbing DIY tips empower you to take control of plumbing repairs at home.
5. Frozen Pipes
During colder months, preventing frozen pipes is crucial. If pipes freeze, turn off the water supply and use a hairdryer or heating pad to thaw them gently. Avoid open flames to prevent accidents. Once melted, insulate pipes to prevent future freezing. Use heat tape or pipe insulation for protection, especially in vulnerable areas.
Frozen pipes can lead to burst pipes, causing extensive water damage. Thawing frozen pipes should be done cautiously, using methods like a hairdryer or heating pad. Prevention is key, and insulating pipes in unheated areas, such as attics and crawl spaces, can safeguard against freezing temperatures. Heat tape or pipe insulation provides an extra layer of protection, reducing the risk of frozen pipes.
6. Water Heater Issues
Troubleshooting water heater issues involves checking the pilot light and thermostat settings. Relight the pilot light following the manufacturer's instructions. Adjust the thermostat to the recommended temperature. Consult the water heater's manual or seek professional help for complex issues. Regularly flush the tank to remove sediment and maintain optimal performance.
Water heaters are essential for providing hot water in homes. Issues like a pilot light going out or incorrect thermostat settings can disrupt heating. Following the manufacturer's guidelines for relighting the pilot light and adjusting the thermostat ensures the water heater operates efficiently. Regular maintenance, such as flushing the tank to remove sediment, prolongs the water heater's lifespan.

Being Prepared for Plumbing Emergencies:
Being ready for plumbing emergencies is crucial for every homeowner. Here's a brief overview and bullet points on how to be prepared:
· Basic Plumbing Toolkit:
Include essential tools like a pipe wrench, plunger, plumbing tape, and a pipe snake in your toolkit. Understand how to use each tool effectively.
· Emergency Situations:
Plumbing emergencies can include Burst pipes, major leaks, or sudden pipe damage. Immediate action is essential to minimize damage and prevent further issues.
· Main Water Shut-Off Valve:
Know the location of your main water shut-off valve. In emergencies, turning off the water supply is the first step to control the situation.
· Quick Fixes:
Be familiar with quick fixes for common emergencies, such as using plumbing tape for temporary seals. Know how to use a plunger effectively for minor clogs.
· Communication and Professional Help:
Keep contact information for emergency plumbing services readily available. Know when a situation requires professional intervention and contact them promptly.
· Safety First:
Prioritize safety by turning off electricity in the affected area if water is involved. Use protective gear, such as gloves and safety goggles, when dealing with emergency repairs.
· Regular Inspections:
Regularly inspect your plumbing system to identify potential issues before they become emergencies. Look for signs of leaks, corrosion, or unusual noises.
· Community Resources:
Be aware of community resources or emergency services that can assist with plumbing emergencies. Know the location of community shut-off valves if applicable.
· Educate Household Members:
Ensure that everyone in your household knows the location of emergency shut-off valves and understands basic plumbing safety. Conduct drills to practice responses to potential plumbing emergencies.
Conclusion
With the knowledge gained from this expanded DIY plumbing guide, you can confidently address common pipe issues in your home. Prioritize safety, turn off water sources when necessary, and seek professional help for complex problems. Empower yourself with these step-by-step solutions, implement preventive measures, and enjoy the satisfaction of a well-maintained plumbing system in your household. Repair plumbing tips ensure you're equipped to handle common issues effectively.