Changing the water filter regularly helps to ensure clean, safe drinking water. Water filters work like strainers or colanders to reduce harmful germs and chemicals in the water.
Some filters are recommended to be changed after a certain number of gallons, others by time. Most filters can be hand tightened or use a strap wrench to get open.
Turn Off the Water
When changing a water filter it is important to turn off the main water supply. This will prevent a back flow of water that is coming through the line while you are trying to open and close the filter housing. Most whole house water filter setups have 3 valve handles that allow you to isolate the system. The first handle is usually a simple flush to the pipe handle that when turned 90 degrees clockwise will shut off the water. The next handle is usually a flower stem handle that when turned counter clockwise will shut off the water (once you figure this out mark an arrow on your system so you won’t get confused next time).
A third valve is often a shutoff valve for each faucet in your home so you can leave one faucet on to help relieve pressure while you are opening and closing the filter. It is also a good idea to have a bucket underneath your filter to catch any sediment that might fall out.
Depending on your system you might need to use a plumber’s silicon grease or PTFE tape on the threaded connections in order to prevent leaks. You can also try turning the water on a faucet and draining several gallons of water to release any pressure in the line.
Turn Off the First Handle
The first handle you need to turn off is the one that controls water flow through your filter system. It is usually a simple handle that turns 90 degrees from flush with the pipe. When it is turned off the water intake is stopped. Some systems use a flower stem handle, in which case righty tighty is closed and lefty loosey is open.
Next, turn off the second handle that is at the bottom of your filter system. This is used for pressure adjustment and it will be very hard to do without the first handle being on.
With both handles off it is now safe to remove your old water filter. Before you do, put a bucket or rag underneath the filter area to catch any water that might drip.
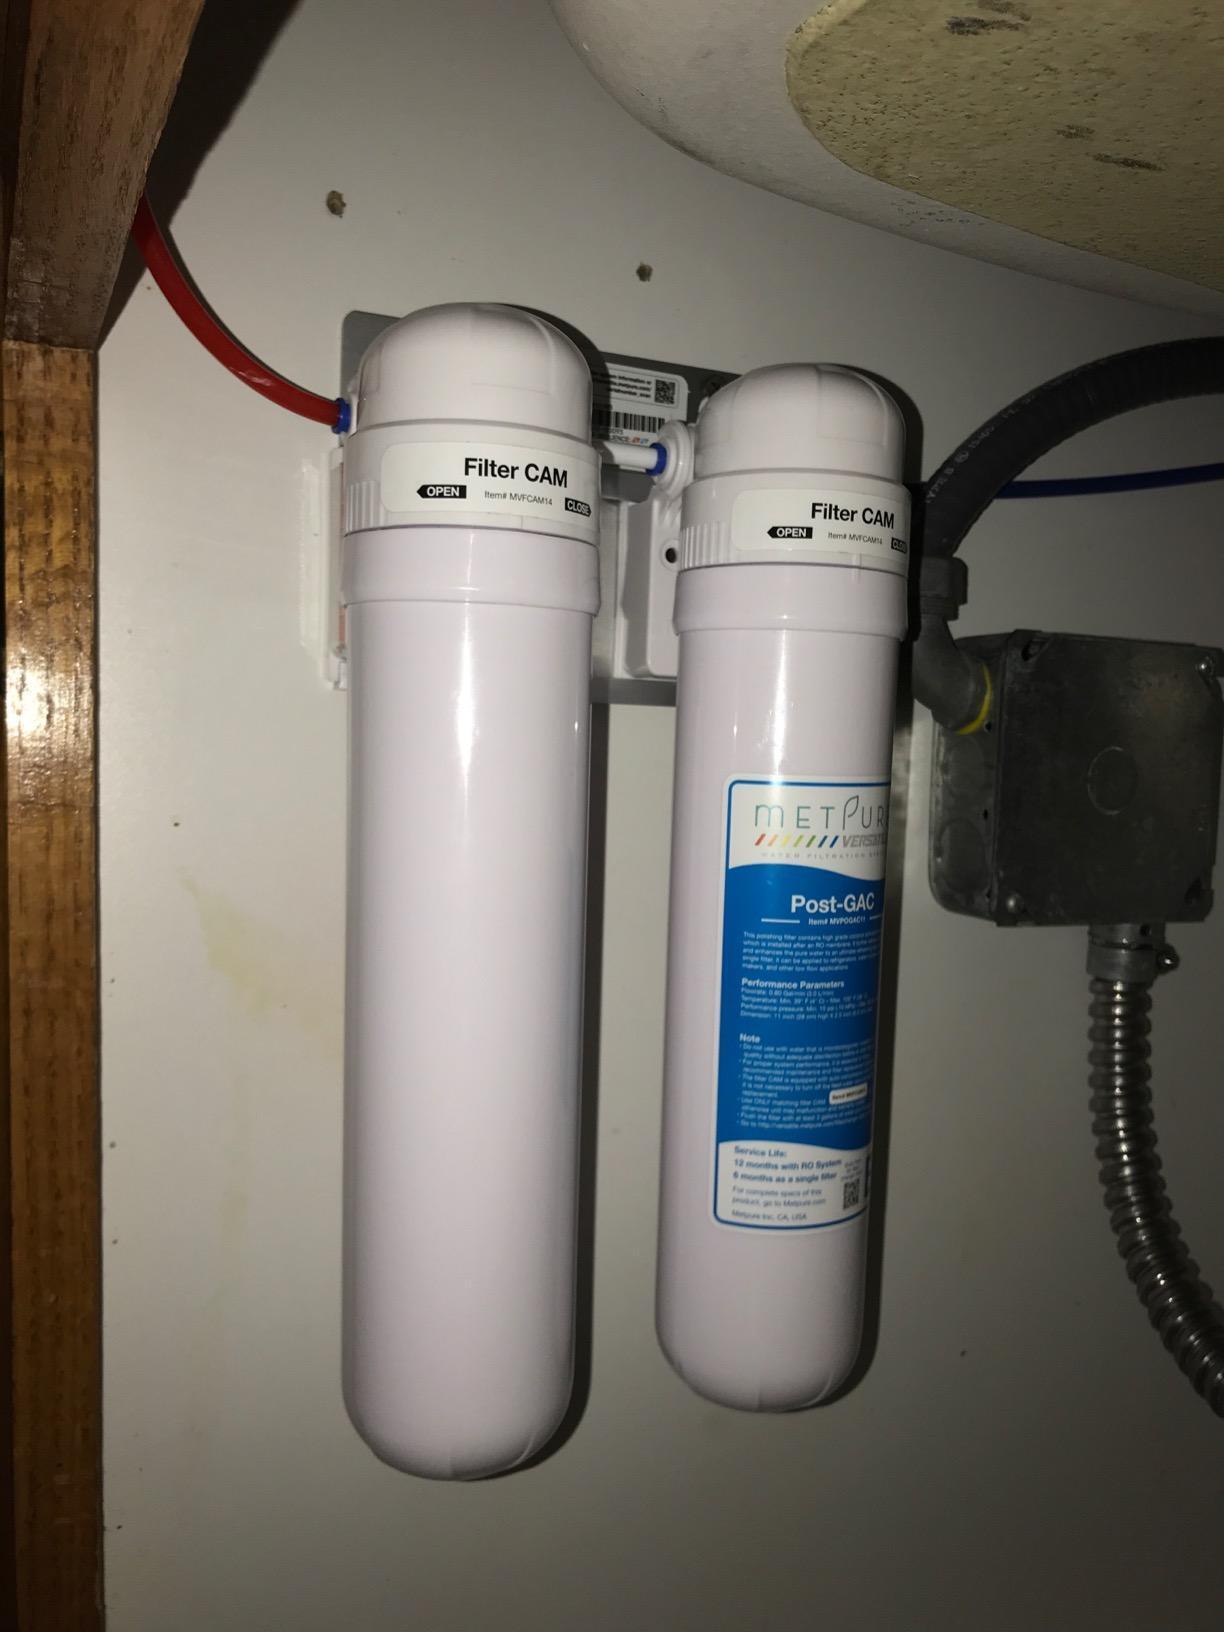
When you remove the filter be sure to look for the black o ring that is inside. If it is flattened you will need to get a new one (the food grade safe gasket) or you will have leaks. You can get a replacement from your local hardware store or online.
Some filters will have a red button that is pushed to release the water pressure inside the casing and make it easier to open up. This is a very nice feature that you should try to find if you can. Once the old filter is removed you should run four gallons of water through the system to properly flush it. This also helps remove any initial carbon dust and loose particles from the manufacturing process.
Turn Off the Second Handle
A water filter is an important part of your home’s plumbing system. However, sometimes these filters can become stuck inside the housing and are difficult to remove. This can be a frustrating experience, but there are several ways to resolve the problem. From using two wrenches to heating up the cap, there are a variety of solutions to help you unstuck your water filter.
If you’re dealing with a whole house filter system, turn off the water at the valve located between the filtration system and your home. Next, press the red pressure release button on the top of the filter to relieve the pressure in the line. You may need to do this twice if the filter is really stuck.
With the bucket under your faucet and your filter wrench positioned around the outside of the filter canister, try turning it counter clockwise to open the housing (note: some systems have flower stem handles and righty tighty is closed and lefty loosey is opened). If you forget things, mark an arrow on your filter wrench or grab a jar and use it as a reference.
Once the filter is removed, dump out the bucket water. Then rinse the filter canister and clean out the insides of the canister and the threads of the canister holder bracketed to the wall. This is where chunks of sediment can get lodged when you open the filter. You may need to use a rag and a small amount of household bleach or any rust-out solution like CLR. Once the canister is cleaned and a new cartridge inserted, it’s important to run four gallons of water through the system to flush the new filter.
Turn Off the Third Handle
Depending on your whole house filter setup you may have a third handle. If you have one you’ll want to open it to stop water flow through your filter (it’s a bypass handle). Some systems also have a red button that releases pressure from the system which will make it easier to open the housing.
Once you’re sure that your system is completely shut off grab your filter wrench and a bucket. It’s a good idea to place your bucket under your filter so you can catch the water as it comes out.
Start by turning your wrench counter clockwise. This will unthread your canister. It can be a little tricky to figure out which way you’re supposed to turn so take your time and use your bucket as a reference. Once you have it unthreaded it’s a good idea to take a rag and wipe the inside of your filter canister. Often times there are chunks of debris lodged in here that you don’t want to accidentally drop into your new filter.
Now that the canister is empty and you have a clean rag handy insert your new filter into the slot. Line it up with the grooves and push in. Once it’s in turn it clockwise to lock it into place. Be careful not to over tighten as this will create a leak.